One day while relaxing with a pencil and notepad, I began to draw a chopper frame that had free flowing lines and curves in the frame, something that would have been difficult or impossible to achieve using tubing of any kind. At the time, I did not really consider building such a chopper since I mainly used round or square tubing for frame building, and such lines would not be possible.
Then, I remembered seeing one of those chopper motorcycle shows on TV where they would form a gas tank using sheet metal, welding the corners so that just about any shape could be created. I thought, “Hey, why not build an entire custom chopper frame out of nothing but sheet metal, essentially creating every single tube from scratch so that it would look more organic and free?”
The idea sounded like an insane amount of work that only the most hard core garage hacker would ever attempt, so in traditional Atomic Zombie fashion, I began cutting that same day!
I’ll warn you ahead of time – this build involves a huge amount of physical labor. Sure, anyone with a cheap AC welder and hand held grinder can do it (that’s all I own), but be prepared to sweat and work muscles you didn’t even know you had. If this was easy, every bike freak would do it, so you will certainly have something unique if you have what it takes to see it through to the end. You have been warned!
Originally, I planned to create this “no tubing” chopper as a plan for our AtomicZombie.com website, but I realized that not many people would be crazy enough to build a complete frame from sheet metal. Instead, I decided to do it as a free source of information that would showcase what can be done with only a basic welder, an angle grinder and a $100 worth of thin sheet metal. The other issue that made this build unsuitable for a DIY plan is that there are no measurements – seriously!
I just took a marker and began to draw free form shapes like forks and frame tubing right on the sheet to be cut out. This build will require you to release your creative energy because I have no idea what the angles or dimensions of any of the tubes are, nor would I have any idea how to even measure such complex shapes.
What I did know ahead of time was how far the wheels will be apart (wheelbase), how long the forks will be, and where the bottom bracket needed to be so that I could reach the pedals (about 32 inches from the end of the seat). Other than that, I took very few measurements, and simply based the “size” of the Terminator on my favorite three choppers, stealing ideas and features that I liked from each one.
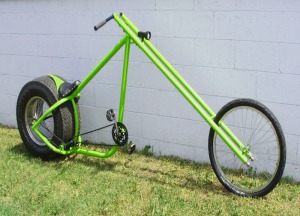 Figure 1 – OverKill was my first chopper to use a car wheel on the rear
The Terminator had to have a car rim on the rear – that was a must. After trying this crazy modification on my first chopper, OverKill, it just seemed silly to go back to some skinny little tire, or department store chopper rear wheel.
As shown in Figure 1, that 15 inch wide car tire puts those 4 inch wide department store chopper wheels to shame, almost mocking them. What really blew me away was how smooth OverKill was to ride, even with that 60 pound monster on the ass end. Another benefit to using a car rim is that you can pick them up free at just about any metal scrap yard and add a few dollars worth of bicycle spokes to create the entire wheel.
It is certainly not difficult to add spokes to a car rim (as you will soon see), and like all things custom, it’s simply a matter of doing a little manual labor in order to create something you can’t purchase. In the world of custom bikes, money ain’t king, only your ability to pour some sweat and blood into your work (I mean that literally).
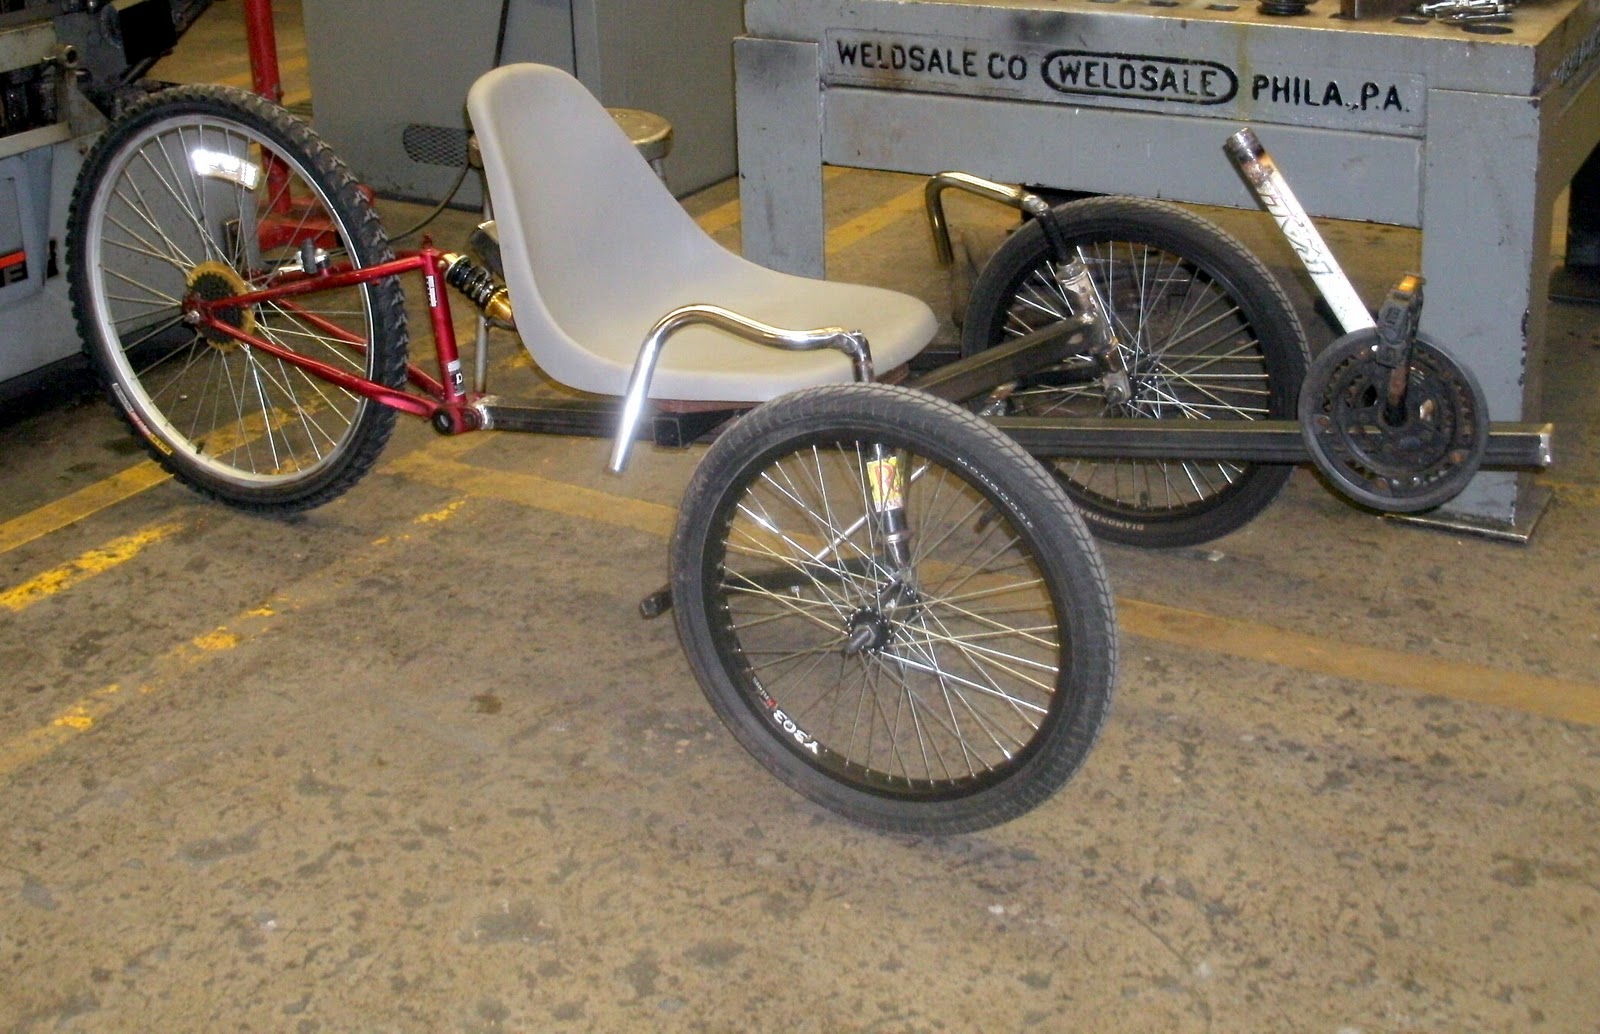
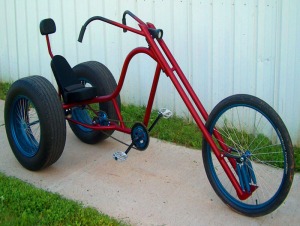 Figure 2 – The Gladiator Trike Chopper was very comfortable
As for seating position and handle bar height, I found the Gladiator Chopper Trike to be about perfect for my riding style. This chopper has two car wheels at the rear, a springer front suspension, and a full recumbent style padded seat. Besides the fact that it took a little effort to get those huge boots rolling, the Gladiator was a real smooth cruiser that I would often ride for hours at a time.
I decided to base the general size and wheelbase of the Terminator on the Gladiator, so I found a bucket that was the same height as the seat on the Gladiator and then took a measurement from the top of the bucket to the position of my heel when extended outwards.
Other than your leg length (inseam), you are free to do just about anything you want on a chopper, creating a massive 5 foot rise on the frame, or keeping it mean and low. Just grab something to sit on, drop a pair of wheels on the floor (front and back), and imagine your chopper. You could even prop up a few broom handles, or bits of tubing to get an idea of what you might like for fork length and frame height as well.
Sometimes I put down the wheels and bucket to sit on then take a photo to manipulate in Photoshop or simply print it out and pencil in the rest of your frame. Seriously, don’t get too technical, or you will wind up spending our valuable time in some forum squabbling about rake and trail when you could be building your chopper!
 Figure 3 – The Vigilante was my first attempt at building a square tube frame
When I decided that I would attempt the Terminator build, I set two rules: there will be no tubing used in the entire frame besides the small necessary bits such as the bottom bracket and head tube, and everything else will be made from flee flowing shapes made by welding sheet metal into custom tubing.
One of my first attempts to avoid round tubing can be seen in Figure 3, the Vigilante Chopper. For this chopper, I used only square tubing, and it was all installed at 45 degrees, creating a diamond shaped frame.
The “theme” was to make the Vigilante look like a stealth bomber featuring a flat black body with many sharp edges and contours. The Terminator will also have sharp edges in the frame tubing, but also free flowing curves, creating a kind of carved look throughout the frame and forks.
 Figure 4 – Starting with the front forks
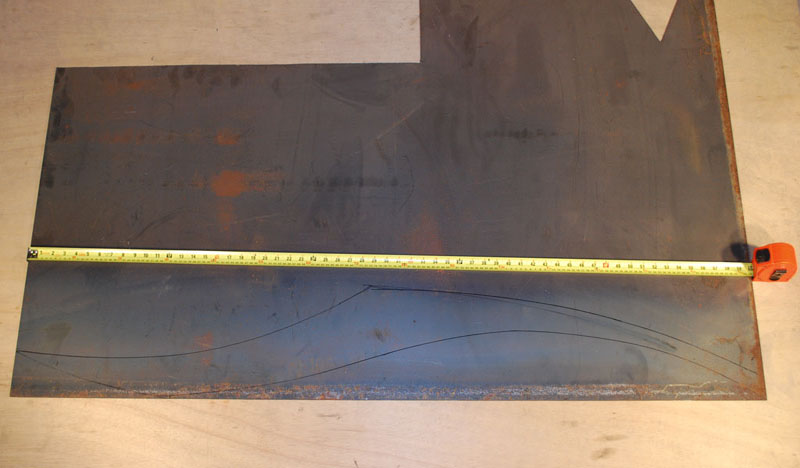
One of the only planned measurements on the entire build was the length of the forks – 5 feet long. The reason for this is because it looked good on my other choppers, and because the scrap piece of sheet metal shown in Figure 4 just happened to be 5 feet across. The sheet metal you will need should be non-galvanized (not shiny silver) and have a thickness similar to that of bicycle tubing (between 14 and 16 gage).
Don’t worry too much about the sheet metal thickness if you can get a good deal on some scraps. It might be a good idea to bring a bit of bicycle tubing along with you and tell the supplier that you want a 4 by 8 sheet of whatever they have that is close to the thickness of the round tubing.
The sheet I used was a 4 foot by 10 foot sheet of 16 gage mild steel, and yes, the damn thing was heavy, just like your chopper will be when you are finished making the frame! If you want a lightweight bike for touring the countryside, then you are reading the wrong plan.
Since the only goal so far was to carve out a 5 foot long fork for the Terminator, I just hand drew a few arcs on the sheet as shown in Figure 4 so that my forks would have a profile similar to a machete. This is where you must put your artistic brain to work, as there are no rules when you are making your own tubing from scratch.
If the tubing has a side wall of less than 1.5 inches, then the frame will be extremely strong and able to support just about any rider. In Figure 4, the pointed end shown on the left of the photo will be the wheel end of the forks, and the other end will become the handle bars. The handle bar end of my tubing is will create a shape with a 1.5 inch profile.
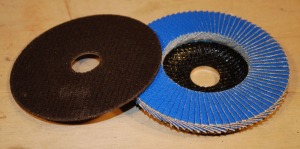 Figure 5 – You will need a decent stack of discs for this project
To cut out the side walls that make up each tube, you will need a good supply of patience, as well as grinder discs like the ones shown in Figure 5. The disc on the left is a 3/32 cut off disc (zip disc) and the disc on the right is a flap disc (sanding disc).
A zip disc is a great tool for cutting along marked lines on sheet metal, and you can even follow curves if the arc is not too small.
The flap disc is used to remove razor sharp edges after cutting the metal with the zip disc as well as cleaning up mirrored parts so that they are both identical. Although this is only a guess, you will probably use at least 10 zip discs and five sanding discs for this project, so look for deals on multi packs. A good full face shield as also a must when you are working with the thin zip discs and doing so much cutting.
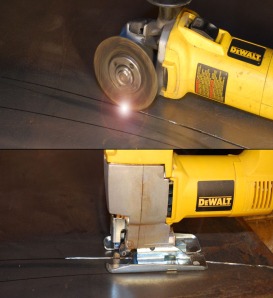 Figure 6 – Cutting sheet metal with a zip disc and a jigsaw
As shown in Figure 6, a jigsaw with a metal cutting blade can also deal with the sheet metal, but it takes a great deal more effort and time to cut so many lines with a jigsaw. I highly recommend that you get used to handling the grinder for cutting and leave the jig saw only for intricate curves that may be too difficult to cut with the zip disc. The grinder is the ultimate tool for any garage hacker, so become one with it, making it feel like an extension of your own arm!
The first of the four sidewalls for the forks are shown being cut in Figure 6. The zip disc took about 5 minutes, whereas it took over an hour to make it half way across the first line with a jigsaw, and wore down a brand new blade.
 Figure 7 – The first front fork side wall cut from the sheet
The first shape is shown in Figure 7 after cutting it free from the sheet using the zip disc. After cutting out the metal, the flap disc is used to clean up the curves and to take off the razor sharp edges along the cut lines. When making two identical shapes, the first one will be used as a template for the second since it would take an engineering degree to figure out these random curves using math.
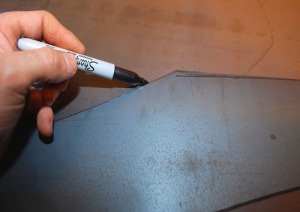 Figure 8 – Tracing out the second front fork shape
The nice thing about using the zip disc to cut curves is that you don’t have to be perfect with the marker since the lines will be “smoothed out” by the action of cutting with the grinder. Once cut, any ripples or mistakes can be cleaned up further using the flap disc as well.
Figure 8 shows the magic process of drawing an identical freeform shape for cutting – using the first piece as a template.
A sharp black marker is the best way to draw a visible line for cutting, and makes tracing a new shape very easy. Since we are making side walls, there are no front and back sides, so it doesn’t matter which way you cut out the shapes.
PART TWO coming soon…stay tuned


You must be logged in to post a comment.